Business Services Plans
Tim2022-08-05T14:06:45-05:00How it works
In a few easy steps.
Create professional templates for your custom branded ordering page in a few easy steps. Our easy-to-use online design studio makes customizing your personal template designs a snap, streamlining the whole design process.

1. Choose your templates
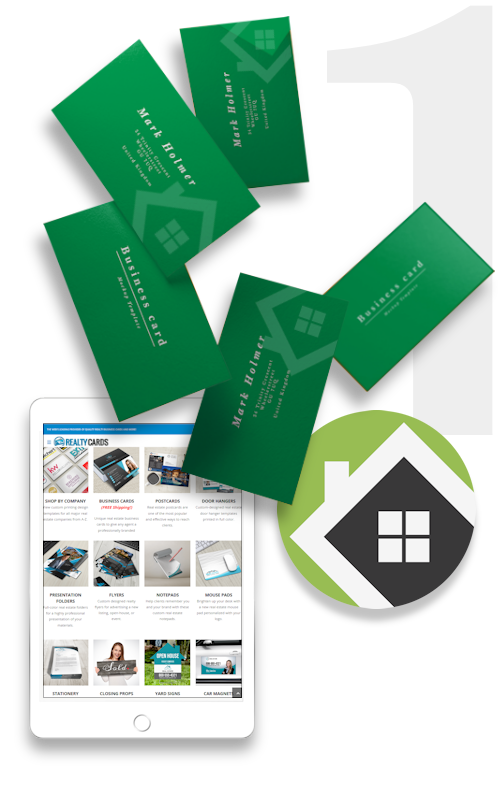
Get started by browsing one of our design template galleries. You can view all of our available templates by clicking the SHOP BY COMPANY link in the menu above. Select your franchise or brokerage from the list of logos displayed. For independent companies, we offer more than 800 business card designs and color combinations to match your brand identity.
The best way to get started is to click the SHOP BY COMPANY link in the menu above, and choose your company. Select your product to view all available templates. Click “Customize” to open the online design studio.
(Products determined by your plan)

We list popular real estate companies at the top of the page. You may scroll down to see all companies listed from A-Z. If you do not see your company listed, please select the “Independent” gallery at the top of the page. All templates in this gallery are fully customizable, allowing you to add your logo and match your companies brand identity.

While this is a matter of personal preference, we suggest choosing a template design that matches closely with your existing brand identity. If you prefer a clean modern design, perhaps select a template with a simpler design to showcase your logo and photo. On the other hand, if you what to stand out in the crowd, select a design with a more graphical look, integrating your logo or photo into the design.
The type and quantity of template designs are determined by the plan you choose.
> View plan details in Step 5.
2. Personalize your design
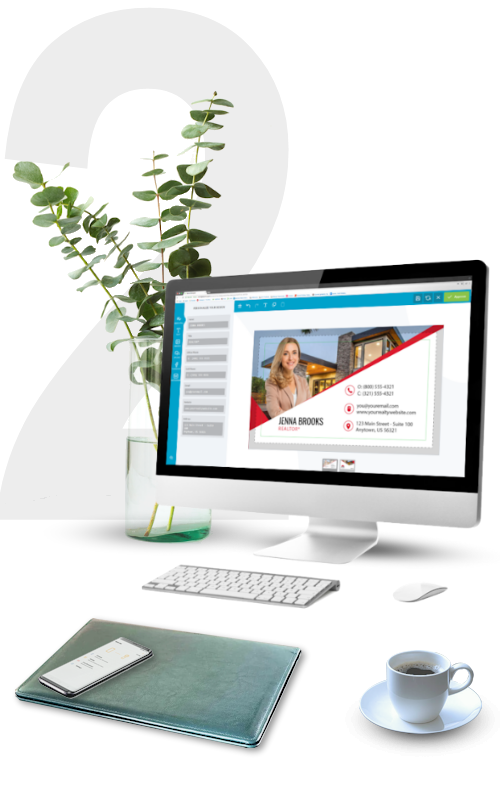
Once you find a template you like, simply click customize to launch the online design studio. All templates are highly customizable, allowing you to add and edit text, upload your logo and other design elements, as well as change template colors and layouts. Add your photo to the template with a click of your mouse, or use the integrated social media link to get photos from Facebook or Instagram. Use the one-click photo background-removal tool to give your template a professionally designed look.
Use the Quick Fill box to edit text on your design. This allows you to replace the placeholder text without having to click each text element on the design. If another element is selected you can always return by clicking the Quick Fill icon at the top of the blue bar on the left of the designer.

To add your photo, click the gray box with the “upload photo” icon. If you do not wish to have a photo on your design, click cancel, then click the red “X” in the upper right corner of the photo upload box to delete.

You can also add photos by clicking the upload button in the blue bar to the left. Once licked, you have the option to upload a file from your computer, or from your phone.

If uploading from your phone, scan the QR code displayed on the screen with your phone.

To add your logo, click the “upload” button in the blue bar to the left.

Click the “Images” button in the blue bar to the left to to show a drop-down menu for realty affiliation logos, stock company logos, design icons and social media buttons.

In addition to the Quick Fill feature, you may also add custom text to your design. Click the text button in the blue bar at the top to add new text to canvas.

To edit font style, click the text you wish to change on the canvas, then click the box with the font name in the top white bar.

To change the color of text and other editable elements in your design, first select the element on the canvas, then click the color button in the top bar. This will then open the color pallet on the left.

Some elements that contain one or more colors in their design, will display color swatches for each color. You may edit each color separately by clicking the swatch in the top bar, then editing from the color pallet to the left.

You can use the preset colors in the pallet, or to add a custom color click the (+) button at the top to add a new color. Once selected you can use the color picker to select a color. You may also enter (#) Hexa or CMYK codes.

This is one of the most important steps. After you have finished personalizing your template, make sure to click the “Save for Later” button in the blue bar at the top. Your templates are then stored in the “Saved Designs” section of your account.
Once all of your designs are saved, we will add them to your custom branded order page.


3. Design Tips
Creating a good looking item is easy when using our online design studio. But there are so many more features built in that can turn a good design into a great design! Here are some tips and tricks that will allow you to get the most out of our online design tools.
Our online designer has a one-click photo background remover built in, making it easier than ever to get a professionally designed look to your item. Simply upload your photo, then click the remove background button in the top bar.


Trying to get your element centered? Use the align tool to position your element perfectly on the canvas.

When adding a photo or other elements to the canvas, they typically end up on the top layer. To move an item to a different layer, either up or down, click the layer button in the top bar and move up or down using the arrows. Single arrows move one layer per click. Double arrow moves all the way to the top or bottom with one click.

Understanding the difference between a bleed, a trim line and a margin will ensure your item turns out as expected. Not following guidelines for bleeds and margins may produce unexpected problems, like text or photo cut too close, or white lines around the edges of your printed item.
Bleed: Extend background images or colors all the way to the edge of the canvas.
Trim: This is the approximate area where item will be cut.
Safety Area: All critical elements including text, images, logos, etc. must be kept inside this area.

When adding text to a design, it’s important to remember to keep the minimum font size to at least 7 pt. When viewing your design on a computer screen, it’s easy to forget the actual printed size of your item. For example, a business card is only 2″ x 3.5″ and text can easily become unreadable if too small.
When uploading a photo or logo, try to use a larger file size with a higher resolution of at least 300 DPI (dots per inch). This way your image will appear crisp when printed. Smaller files with a lower resolution will print with a blurry, pixelated appearance. The easiest way to determine if your photo has a good resolution is to look at the file size. Your file size should be a minimum of 1mb or 1024kb.
4. Launching your page
Once you have finished designing your templates and have selected the designs to display, we will build your custom branded ordering page. As soon as your page is launched, you and your team will be able to order products.
We will work directly with you to help finalize your design templates, checking your artwork and making sure your files will print correctly. If needed, we will adjust designs or request additional files to ensure each design is perfect.
Once we review your files and everything looks good, we will build your custom branded order page. This page will hold all of your design templates, allowing you can order what you need, when you need it.
After your templates are approved and ready to load, your page will be ready to launch in 2-3 business days. Your business support rep will be with you every step of the way, from initial template design to launch.
Your custom branded order page will have a unique URL (website address). This website address will look something like this: www.realty-cards.com/yourcompany
You will also be able to get to it by typing your company name in the search bar at the top of any page, where it reads “Find your company…”.


5. Plan Details
View details for each plan including template options, your branded ordering page, plan costs and product discounts. If you need more information on the plan you selected, please contact a member of our business services team.
OVERVIEW
The perfect plan to automate your printing needs and best of all, it’s FREE! Choose up to (6) business card designs from any gallery and we’ll custom brand them with your logo. Then we will create your own personal webpage to display them, making it fast and convenient for your whole team to order online.
COST
The Realty Express plan is FREE for a limited time.
TEMPLATES INCLUDED
Includes up to (6) business card templates to display on your page.
PRODUCT DISCOUNTS
While the Realty Express plan does not include wholesale pricing options, you do receive periodic sale offers that are exclusive to Realty Express plan members only. For wholesale pricing, you may upgrade to our Realty Pro, or Realty Custom plan at any time. Both plans include a 30-day free trial with no obligation.
SUPPORT
In-house design support from our business services team.
OVERVIEW
This plan automates the printing process, and your entire team enjoys business-level preferential pricing and discounts. All design templates are custom branded with your logo, and then displayed on your own personal online ordering portal. With the Realty Pro plan, you also get personalized support from our business account managers.
COST
The Realty Pro plan is FREE for 30 days, then $9/mo. after that.
TEMPLATES INCLUDED
Includes up to (12) business card designs, as well as up to (3) additional items of your choice.
PRODUCT DISCOUNTS
– 15% off Premium Business Cards includes free U.S. shipping
– 15% off Luxury Business Cards
– 15% off Specialty Business Cards
– 15% off Marketing Materials
– 15% off Promotional Items
– 15% off Signs, Banners and Car Magnets
SUPPORT
Enhanced support from our business services team.
OVERVIEW
Our premium-level plan is suited for medium to large offices who order printing every month. You’ll receive dedicated support from our business services team. Your office manager, or any member of your team can call us toll free anytime to assist with their order.
COST
The Realty Custom plan is FREE for 30 days, then $19/mo. after that.
TEMPLATES INCLUDED
Includes Full brand control including any (24) products of your choice.
PRODUCT DISCOUNTS
– 50% (Buy One/Get One*) off Premium Business Cards includes free U.S. shipping
– 20% off Luxury Business Cards
– 20% off Specialty Business Cards
– 20% off Marketing Materials
– 20% off Promotional Items
– 20% off Signs, Banners and Car Magnets
* All business cards quantities are doubled automatically
(ie: order 500 cards/ receive 1000 cards)
SUPPORT
Dedicated support from our business services team, including one-on-one instruction and a direct phone line to reach us.
100,000+ real estate professionals trust us with their printing
Realtor branding and promotional experts for all your online printing needs
ONLINE PRODUCT DESIGNER
Personalize Our Design Templates
FREE ARTWORK CHECK
We Will Review Your File Before Printing
QUALITY PRODUCTS GUARANTEED
We Deliver Professionally Printed Products
Realty Cards has everything to elevate your STYLE!IMAGE!BRAND!
The Industry’s Most Creative Real Estate Agent Marketing Materials


